Showing posts with label Technology. Show all posts

August 09, 2016

How To Download Whatsapp For Mac Or Windows Pc Without BlueStack Or Emulators

Technology Keeps on advancing. Now you can use Whatsapp on Windows or Mac without emulator. You don't have to download any heavy emulator before you can run Whatsapp on Windows or Mac PC or Laptop.
whatsapp download for pc


This tutorial will guide you step by step to download and run Whatsapp on your mac or windows PC or laptop. Let's get to it.


Step 1 is to have a whatsapp account which you should already have if you use whatsapp for communication. This is simply setting whatsapp on your android or iphone and it is tied to your phone number.

Step 2 is to download Whatsapp for Mac or Windows Pc or Laptop from the whatsapp official website.

Step 3 is to run the whatsapp app on your mac or windows pc. A screen will load with a QR code as shown below.
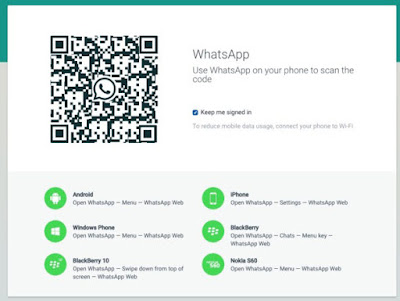
whatsapp download for pc

Step 4. On your android or iPhone, open the Whatsapp app.

Step 5.. In iPhone, choose the “settings” tap and select "WhatsApp Web" as shown below. On android, simply choose the “options” tap and select "WhatsApp Web". A screen will show and ask you to scan the QR code on the Mac or Windows PC screen.
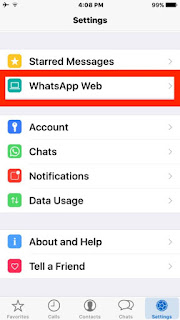


Step 6.. Scan the QR code on the Mac or Windows PC screen and wait for a moment. Whatsapp desktop client will retrieve all your contacts and conversations and tadaaaa!!!, You can now start using Whatsapp on windows or Mac PC without BlueStack or any emulator.
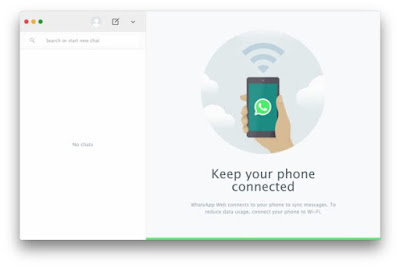

A very simple basic step by step process. Kindly ask any questions in the comment section or in our forum and we'll do our best to help you out.
How To Choose Or Enable Dark Mode or Night Mode Theme In Windows 10 Anniversary Update

Now Windows releases the Windows 10 Anniversary Update and a lot of questions come with it. 

enable night mode or dark mode in windows 10 anniversary update

A lot has changed with this new windows 10 anniversary update and one of the most amazing features it came with was the ease to change theme to dark or night mode. If you have installed the latest windows 10 anniversary update, then this tutorial will help you to enable night mode or dark mode theme with a step by step guide. Lets get to it.


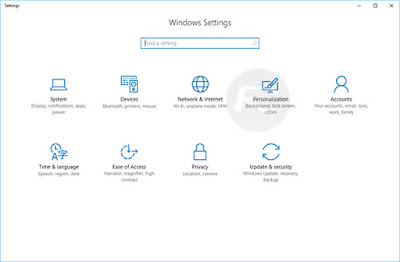
Step 1 is to launch the settings app. That's where all changes will be made. To easily launch the app, simultaneously press the windows key and the “I” key together. This will launch the settings app as shown below and we will be ready to change our theme.

enable night mode or dark mode in windows 10 anniversary update

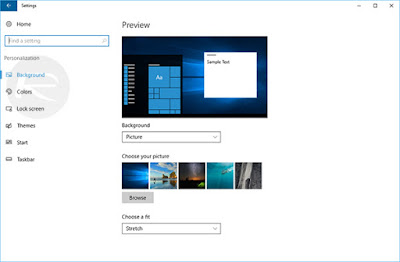
Step 2.. Choose “Personalization” from the settings page and from the left panel, choose colors as shown in the image below..

enable night mode or dark mode in windows 10 anniversary update

step 3..Check the bottom of the new window that appears , there is a section titled “choose your app mode”. Select this section.

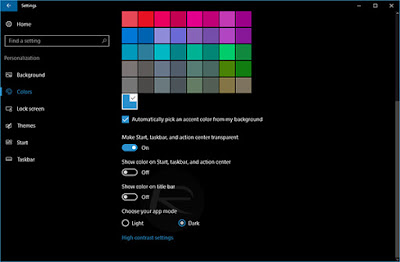
Step 4.. Now below the window, there are two options named “Light” and “Dark”. Select the “Dark” option as shown below and tadaaaa!!!! you have enabled dark theme mode in windows 10 anniversary update.

enable night mode or dark mode in windows 10 anniversary update

If you want to use the dark theme mode across the windows platform and activate it for supported apps and softwares, Just do the following.
After selecting the “Dark” option from Step 4, look right above it (the "Dark" Option), there are two options which are “show color on title bar” and “show color on start, taskbar, and action center”. Make sure both options are turned off.
Now, you can see colors in boxes above the interface. This is the accent color. The Color you want to use alongside the dark color especially when you are using apps and softwares. This is a personal decision but if you don't know which color to pick, just check the “Automatically pick an accent color from my background” button right below the colors and you're all set for the dark theme in windows 10 anniversary update.

Kindly ask any questions in the comment section and i'll do my best to answer them.

June 30, 2016

How To Install Android Apps And Apk On Windows/Mac

It is very obvious that there are certain apps on android which will be good if used on the PC or Laptop but sometimes we just can't work it out. In this article, i'll be teaching you how to install android application on your windows/Mac PC or laptop. Its a very simple process so lets get down to it.

First, you need to download an android emulator to you PC or laptop.

Apk to bluestacks
there are different android emulators out there but the best according to my experience is BlueStacks. BlueStacks is an android emulator which allows to run andriod apps and apk files on windows and Mac. They claim to have over 5 million users and still growing.
BlueStacks App Player is available for XP,Vista, Windows 7,8 and 10.
Click below to download


download-button

After download completes, follow the setup wizard to install BlueStacks on your PC or Laptop. when the installation is done, all apk files will automatically change icon to BlueStacks.
Just click on your desired apk file to install. You can also open BlueStack and search and install any app you want using the provided search space. 
Note:The BlueStacks search might not give you the results you want. you can always use the apk file instead.